2025-02-18
Website optimization
How to optimize images for your website


How to optimize images for your website
Through the years of helping companies big and small optimize their websites, there was always one common issue that when fixed dramatically dropped load times, images. It seems that no matter how high quality your website is, the images were always the part of SEO fundamentals designers and developers seemed to miss. The issues were vast, but the result was always the same, slow load times. That’s why we’ve put together a guide on how to optimize images for the web, so you don’t end up making the same mistakes that so many web managers do. If you want to make sure your images are helping your website grow, and aren’t causing problems with bounce rates, losing you rankings on search engines, or causing slow load times, this guide is for you.
1. What image format should I pick for my images?
When it comes to picking the right format for images, there is a right way to format and a wrong way. It really comes down to the meaning of your images and their purpose on the page. This is especially important when you are building your own websites via custom code, but it applies generally to all uses of images on any web page using any CMS, language, or page builder.
How should I use a JPEG for the web?
JPEGs (also called JPGs) are great format for highly detailed images because they can keep the file size small without sacrificing image quality. The biggest issue with JPEG is it’s inability to have transparent backgrounds. If you make an image that is supposed to have a transparent background, but you export it as a JPEG, it will show up with a white background that it defaults to. This means you should stick to using it for highly detailed and large pictures that don’t need to use transparency, so you can retain the quality of your images and keep the file size as small as possible.
How should I use PNG for the web?
PNGs are a great way to display pictures that need a transparent background. This is especially good for images on dark backgrounds, icons that you want to have value for your search engine rankings, or animated pictures. Avoid using PNGs for highly detailed images, unless you need the transparency, as it can lead to large image files sizes that will weigh down your pages and slow your load times dramatically.
When should I use a PNG vs a JPEG?
The most common image formats used today are PNG and JPEG. They have been the most common formats for a very long time and will continue to be due to their wide variety of browser support and ease of access. Any common browser today will support these formats, so using them is a best practice. If your image has a highly detailed background, you should use a JPG to keep quality high and file sizes small. If you need a transparent background or have simple shapes, you should use PNG as your file format. If you can use WebP in place of either JPG or PNG, you should, but make sure that your users can use the format with their browser or supply fallback versions in case they cannot.


How should I use SVG for the web?
SVG is an extremely versatile image format for the web, especially as it’s written with XML. The main uses for SVG on the web are your logo, icons, interactive icons for usability that aren’t SEO value generating (like up and down arrows that open and close content accordions), highly detailed animations, and CSS and JS decorations.
The two main advantages of SVG are its scalability and the lightweight file sizes. The scalability means it won’t break or pixelate as it grows or shrinks with the size of a user's monitor. That makes it perfect for design assets that need to grow and shrink with the monitor sizes and pixel density like arrows, logos, and icons.
The best part of SVG is it’s a highly supported format on modern browsers. It can also be read by search engines and various tools like screen readers and ranking bots, which makes it good for accessibility. Be careful if you are using SVG not to make massive file sizes, as overuse can lead to load time issues due to the need for the browser to actively translate and render the code to generate the images. Keep your SVGs small, and they can be an incredible design tool for your website.
Should I use GIF for web development?
This is a common question we get when working with clients on optimization. The short answer is no, do not use GIFs for your website. There are simply better formats you can use for animations like APNG, MPEG4, WebM, and even SVG. GIFs are an incredibly popular format in the modern age, and they tend to be a great way to convey a point. The issue comes down to two major things, quality and load time. GIFs are notoriously bad at maintaining the quality of the images in the cycled footage. On top of that, they tend to be very large in size, and that slows down the load speed of the page. If you want animations, MPEG4s on loop is a good way to go. The file sizes are already going to be large, so try to use a format that is easily controlled via caching headers. The biggest example I can give is that major platforms like Twitter all choose to convert GIF to MPEG4 for a variety of reasons like clarity, performance, and file size.
How should I use WebP for the web?
WebP is a great format for pictures online, as it is versatile, lightweight, and growing in support. The use of WebP can dramatically improve the performance of your web page’s load times by reducing the size of the files. It supports high detail images and transparent backgrounds in a lightweight package, which is great for your users and your rankings. The issue with WebP is it cuts out parts of the market due to a lack of support on some major browsers. The mainstream browsers like Chrome, FireFox, Safari, Opera, and Edge all support the WebP, and that covers a large majority of the market. This used to not be the case, but recent updates and versions of browsers like Safari and Edge have made support of the format a green light. The only major market that this now cuts out is users who are still on Internet Explorer. If you know your market uses Internet Explorer, you might want to avoid using WebP on your website, or at least create fallback versions of your images in JPG or PNG formats to ensure compatibility.
2. How do I properly size my images?
The next major issue we tend to run into with optimizing images for clients during performance auditing is image sizing. Often times you will see images that are too large or too small for their containers being displayed to the end user, and that will slow down load times dramatically.
If the image is too large, the browser has to take the image that it’s given and rescale the image to fit the container that it’s being displayed in. Serving images that are too small can lead to images being upscaled to fit their container in much the same way, but the results are normally blurred or stretched images. Resizing images takes processing power and time to get right, and can dramatically slow load times.
Serving images that are too big or too small can also lead to other major issues in your search results ranking. They can cause slower load times, blurry images, and layout shifts, and these all result in dings to your search results potential. So how do you fix it?
The easiest way to make sure your images are the right size is to test them in the environment they are going to be viewed in by the end user. This could be on a local sandbox or a previewed page prior to publishing depending on what your site is built on.
Once you have a view of the finished product in a live browser environment, you will want to open up your inspect element tools for the browser. I highly recommend moving your tools to the bottom of the page, so you can get a view of the entire container your content will live in from left to right. If the container is smaller than the maximum size it can display, you risk making your images too small for the container’s maximum size which can result in images getting stretched or blurred.
Now that we have the page set up to test, you want to activate the “select element to inspect tool,” which can be found in the top left corner of your inspect console on Chrome. Now that you have it activated, you want to hover over the picture in your content and look at the box that appears when you hover over the element. It will show you the dimensions of the box that the image is in, and that is the size you should convert your image to fit. Once your image matches the maximum size of the container for your website, you can move into optimizing that image’s file size. If your images show up on your page speed test as blurred after matching this, try resizing the image to match the maximum size of the breakpoint instead.
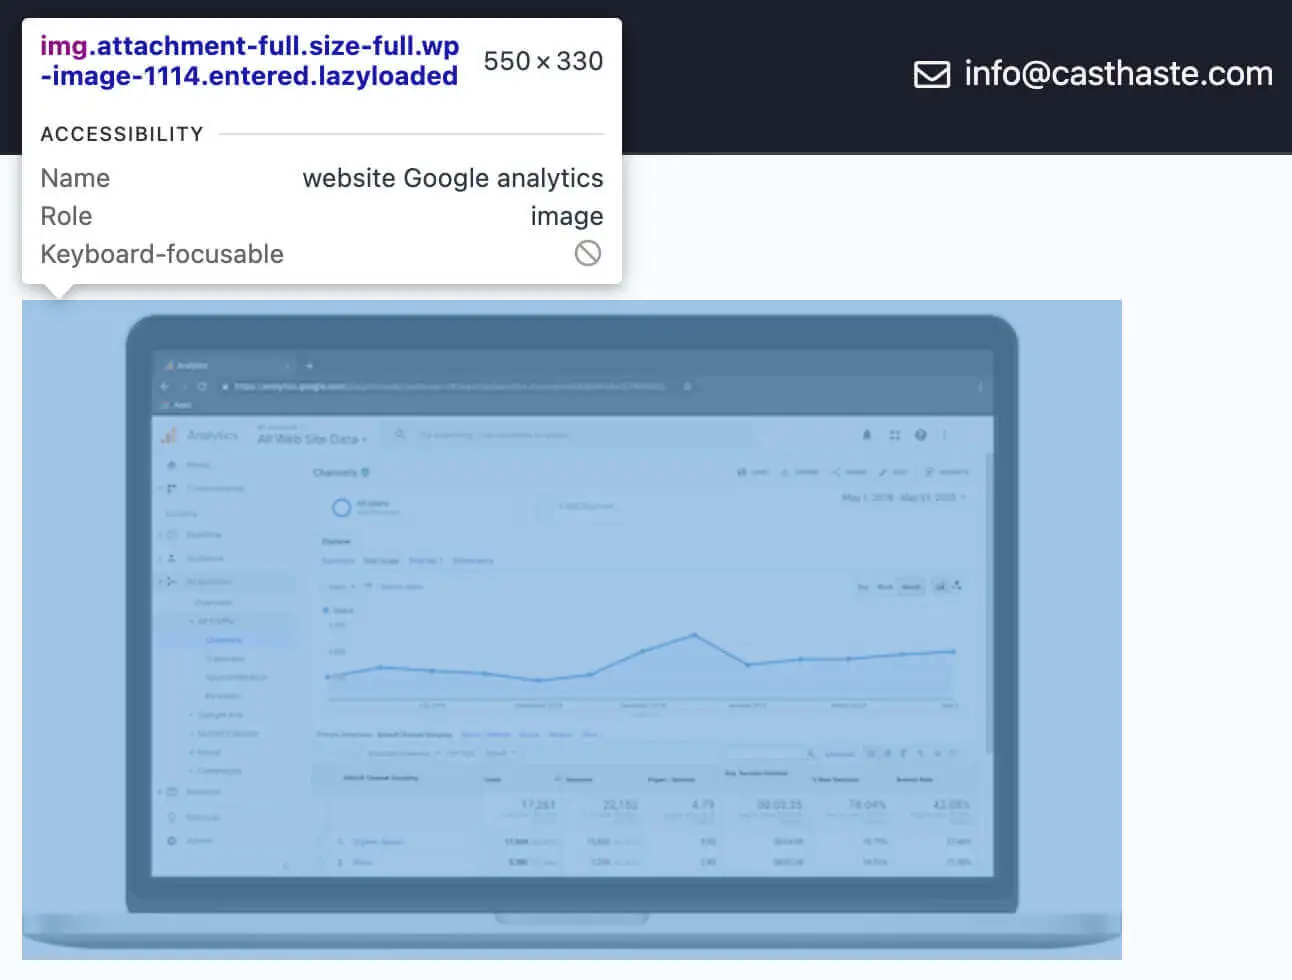
Make sure you add the height and width values to your image tag as well. The height and width value of the optimized images reduces load times because it will tell browsers the exact size to render an image. This reduces the processing power browsers use to render the page which leads to faster load times. The other benefit is it reduces content layout shifts (CLS), a core metric of page performance because it doesn’t have to resize the image to fit the container.
If you need different sizes of images for different screen sizes, you can use the srcset=”” value to determine the image size that is rendered based on the device.
<img src="image-default.jpg" srcset="image-480.jpg 480w, image-800.jpg 800w" sizes="(max-width: 600px) 480px, 800px" alt="Descriptive alt text">
3. How should I optimize image file sizes?
The main goal of optimizing your images is to remove unnecessary data from the image that simply adds to the file size. The larger the file size and more unnecessary metadata the image holds, the more nonsense your users have to download to their browser, and that slows download speeds. The goal of any webpage is to be 1MB of data or less. The higher you go above that threshold, the slower your website will load. Most of the time, pages that fail this test normally fail it due to excessive image size, and it normally shows up as an error named "efficiently encode images" on page test tools like Lighthouse. Maybe they have left the metadata untouched, they’ve used the wrong format, or they’ve simply forgot to compress their image. No matter the cause, there is a simple way to fix this. Download the image and use a compression tool or algorithm to remove unnecessary data from the image. This leaves behind a compressed version of the image that is lighter weight, and, in return, easier for the user to load when they land on your website.
There are many amazing image compression tools and plugins you can use, but my favorite by far is TinyJPG, which can compress JPG, PNG, and WebP files to where you lose massive amounts of file size without sacrificing quality. This has been our go-to for years and is free to use with 25 images at a time. If you want to do a massive bulk compression, they offer bulk plans as well that are extremely reasonable on pricing compared to buying Photoshop or a compression plugin. If you have Photoshop, you can also load your images there and use their compression tools which do a solid job of compressing images, removing the metadata, and maintaining the image quality as well. If you are a WordPress user and don’t want to deal with the process of manual compression, you can always try tools like Smush or Imagify which can compress your entire media library with the click of a button.
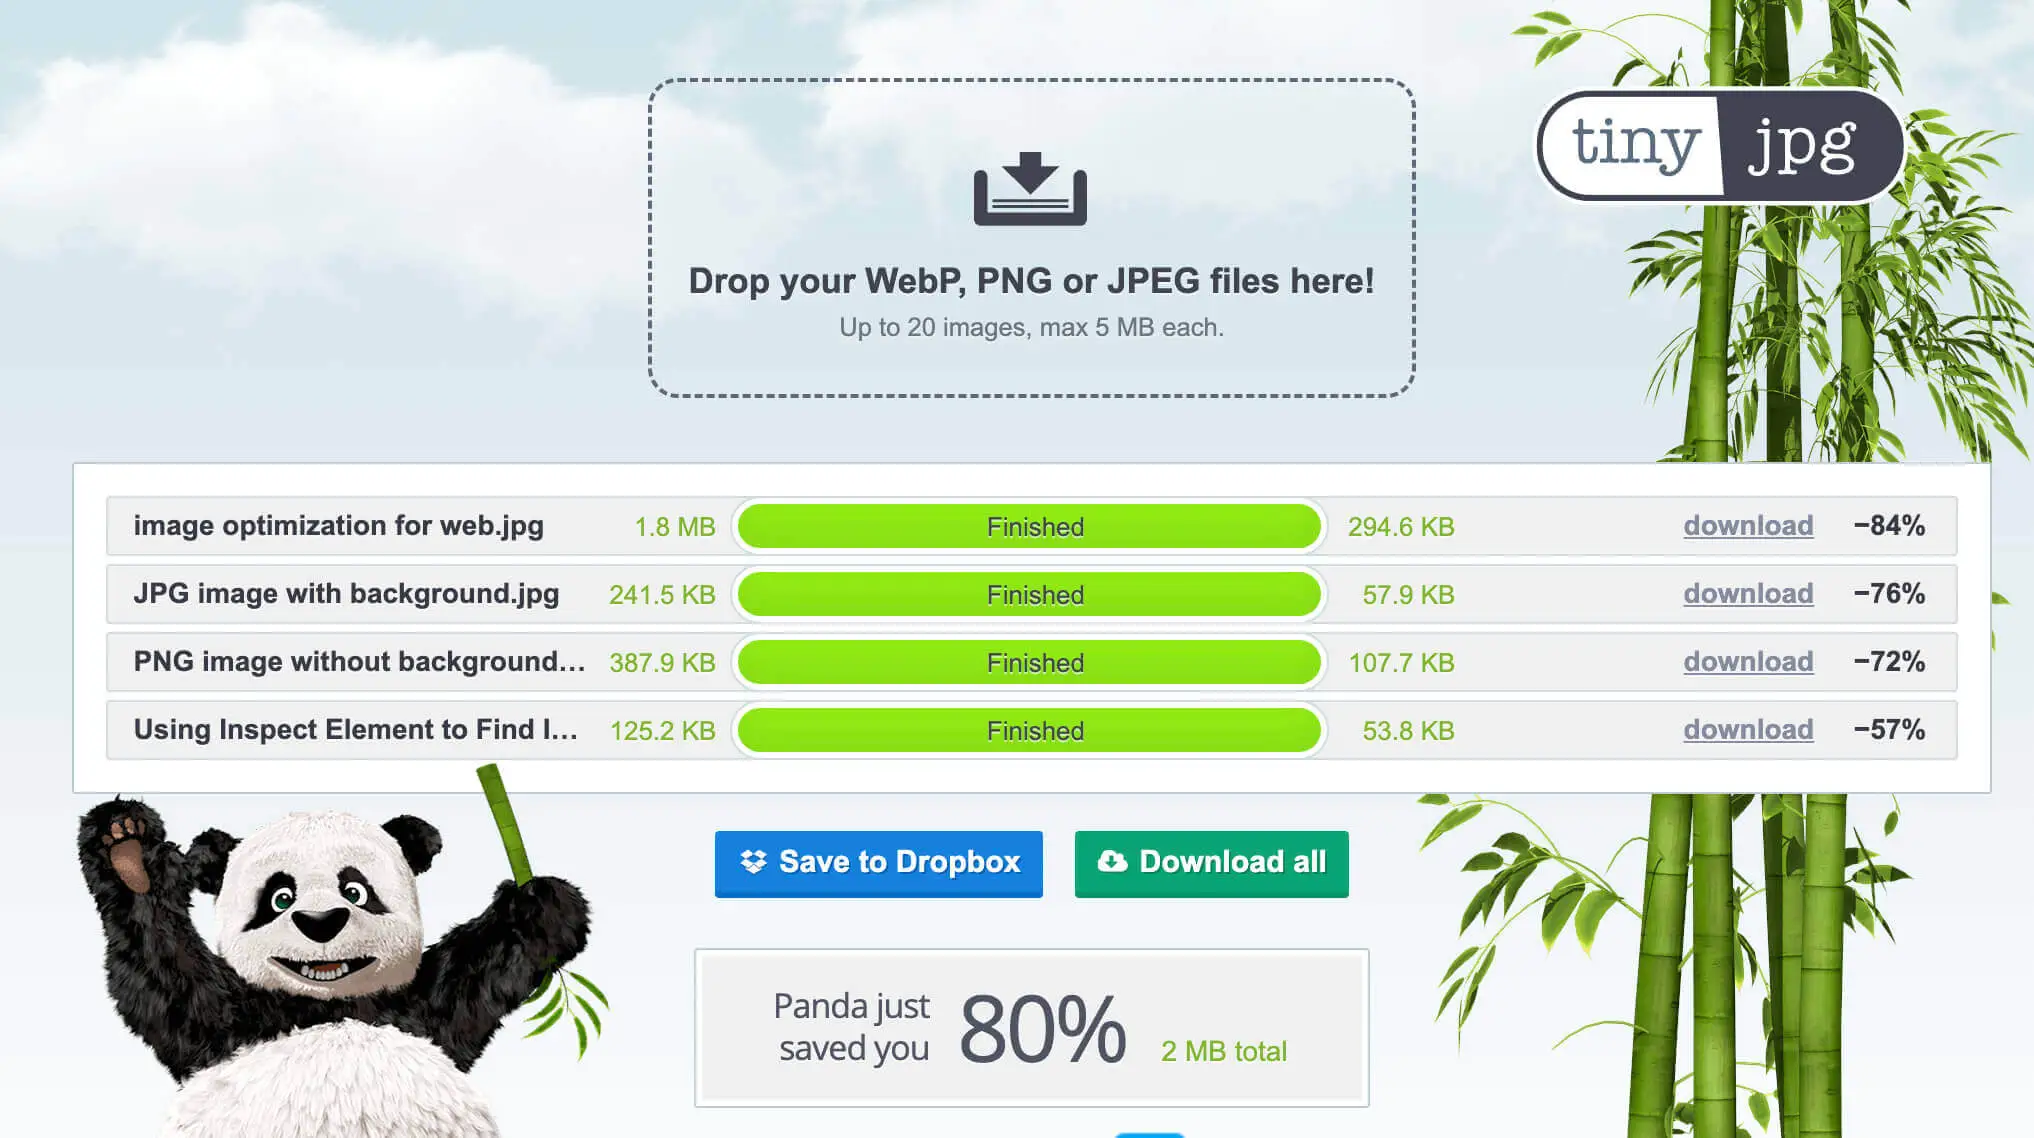
As you can see from this image, efficiently encoding the images with TinyJPG saved 80% of the image weight. The total dropped from about 2.5MB to just over 400KB. That savings translates into faster load times for your users when they visit your website.
One image going from 1.8MB to 294KB as a JPG can be the difference between hitting the 1MB max page size or almost doubling it. That alone can be the difference between passing or failing your performance tests on PageSpeed Insights.
The savings can go even further when you swap to a format like WebP. That same 294KB image as a JPG is only 187KB as a WebP. Those savings make a huge difference in load speeds when you’re on slower networks, and your website should load fast under any network condition.
4. How should I name my images?
Naming your images is another great opportunity to improve the quality of your webpage’s ranking potential that many people simply overlook. Naming your images should serve two purposes: relating the image to the article or page, and helping you add additional keyword value. If you are leaving your images named as untitled or random numbers and letters, you’re doing yourself a disservice towards your ranking potential.
Take the image above from TinyJPG as an example. That image is called compressing-image-tinyjpg.jpg so that it relates directly to what it represents. The search engine bots will read the file name of your images, and use that to help create and understand the relevance of your images and their impact on the user’s understanding of the article or page.
As you go through and start to do the compression of your images, you might find yourself running into repeat download tags on the end like compressing-image-tinyjpg(1).jpg. To get around this, simply delete the old image or move it from your downloads folder on your computer, so you get a fresh title each time you download the compressed image. The cleaner the naming convention of the image, the better the search engines can understand and relate your pictures to your words.
5. How do I properly write alt text for my images?
Writing alt text shouldn’t be complicated, but it’s something that a lot of developers and content managers struggle with. The easiest way to write a good alt text is to think about what you are seeing in the picture and describe it. These are tools for people who use accessibility tools like screen readers to understand what your image is, so they can pick up context clues to how the image relates to the article. Just like the image name, bots also read this text to relate and understand the use of the image to the meaning of the article. You can also get keywords relating to the article into the alt text if you word your description properly, but don’t overcomplicate it. Keyword stuffing in this location can ultimately hurt you if you overdo it, so just keep it simple.
Let’s again look back to the image used above that we talked about in the last two sections. A great alt text for that image is something this:
“using TinyJPG to compress blog images to save 2mb of data”
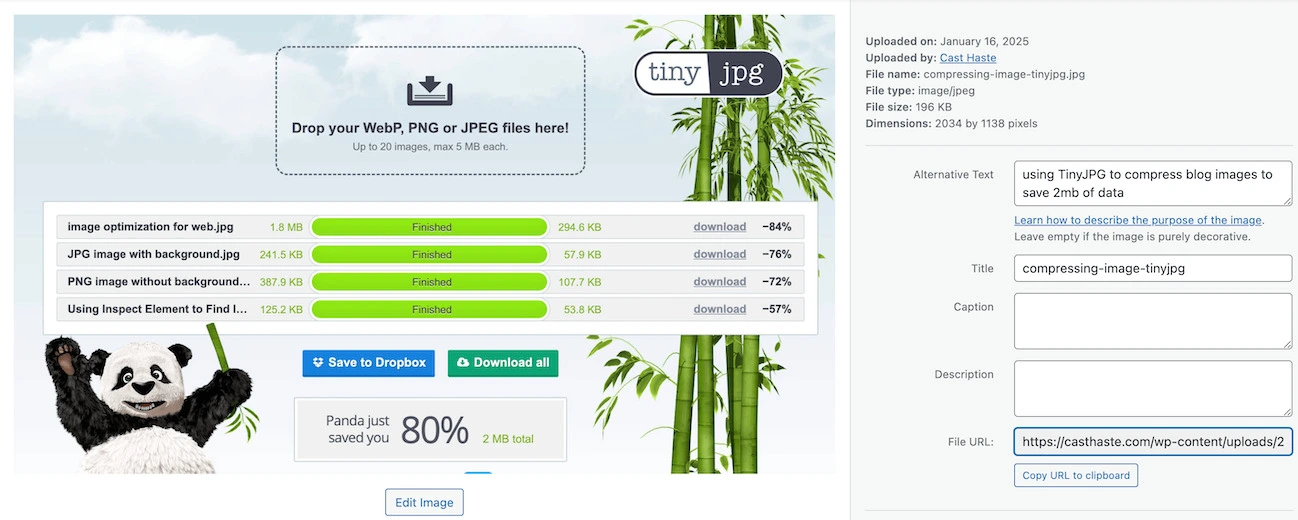
This is short, sweet, and to the point. It describes exactly what you are seeing in the image, and that’s exactly what the users who use the alt text and the bots who rank it want to know about the image.
Most CMS systems have a way to add alt text to your image built into their GUI, but if you’re hand coding, you will have to add it on your own. You can simply add alt=”alt text here” to your image tag. Make sure you replace the text in the quotes with the alt text you want screen readers and bots to read. Here’s an example:
<img src="optimize-image-tinyjpg.jpg" alt="using TinyJPG to optimize blog images to save 2mb of data" width="500" height="600">
If your image is purely decorative, you should leave the alt text blank. If you are getting pinged on pagespeed insights for lacking alt text on a decorative image, you can add a blank alt tag into your image call by using alt=”” to get rid of the issue.
Don't miss this opportunity to put keywords in your alt text to improve the relationship between your images and the focus keyword. We remember doing an audit on the Single Grain (a leader in digital marketing) website, and it came back with 439 images that didn't have alt text. That was 439 opportunities to improve keyword relation to a page through images that were missed.
6. Should I lazy load my images?
Lazy loading your images is a great practice to get into for faster loading times. It will push the loading of images that aren’t in the initial viewport to a later point in the load cycle, and will load the images as the user gets to those areas. Doing this can help you minimize the size of your webpages, and the result is faster loading times for users. This can result again in higher rankings, so it’s a good practice to get into.
If you don’t have a system that can automatically lazy load your images, you can add the lazy loading tag into your image tag to make it happen like this:
<img src="optimize-image-tinyjpg.jpg" alt="using TinyJPG to optimize blog images to save 2mb of data" width="500" height="600" loading="lazy">
Make sure you don't lazy load images that are above the fold! Those images should be set to eager (or given a priority tag in JS) instead, so they are pre-loaded with the initial code execution.
7. How do I know my images on the page are ready to be published?
Once you have all of these pieces of the puzzle taken care of for your images, you can test them using a page speed testing tool like PageSpeed Insights to see if your images pass the test. If they aren’t set up properly, you will see warnings throughout the report about the various issues we talked about in this article. The major items you want to look for are properly sized images, efficiently encoded images, defer offscreen images, explicit height and width values, and alt text for images. If you don’t see these warnings about your images on the report, you have successfully optimized your images!
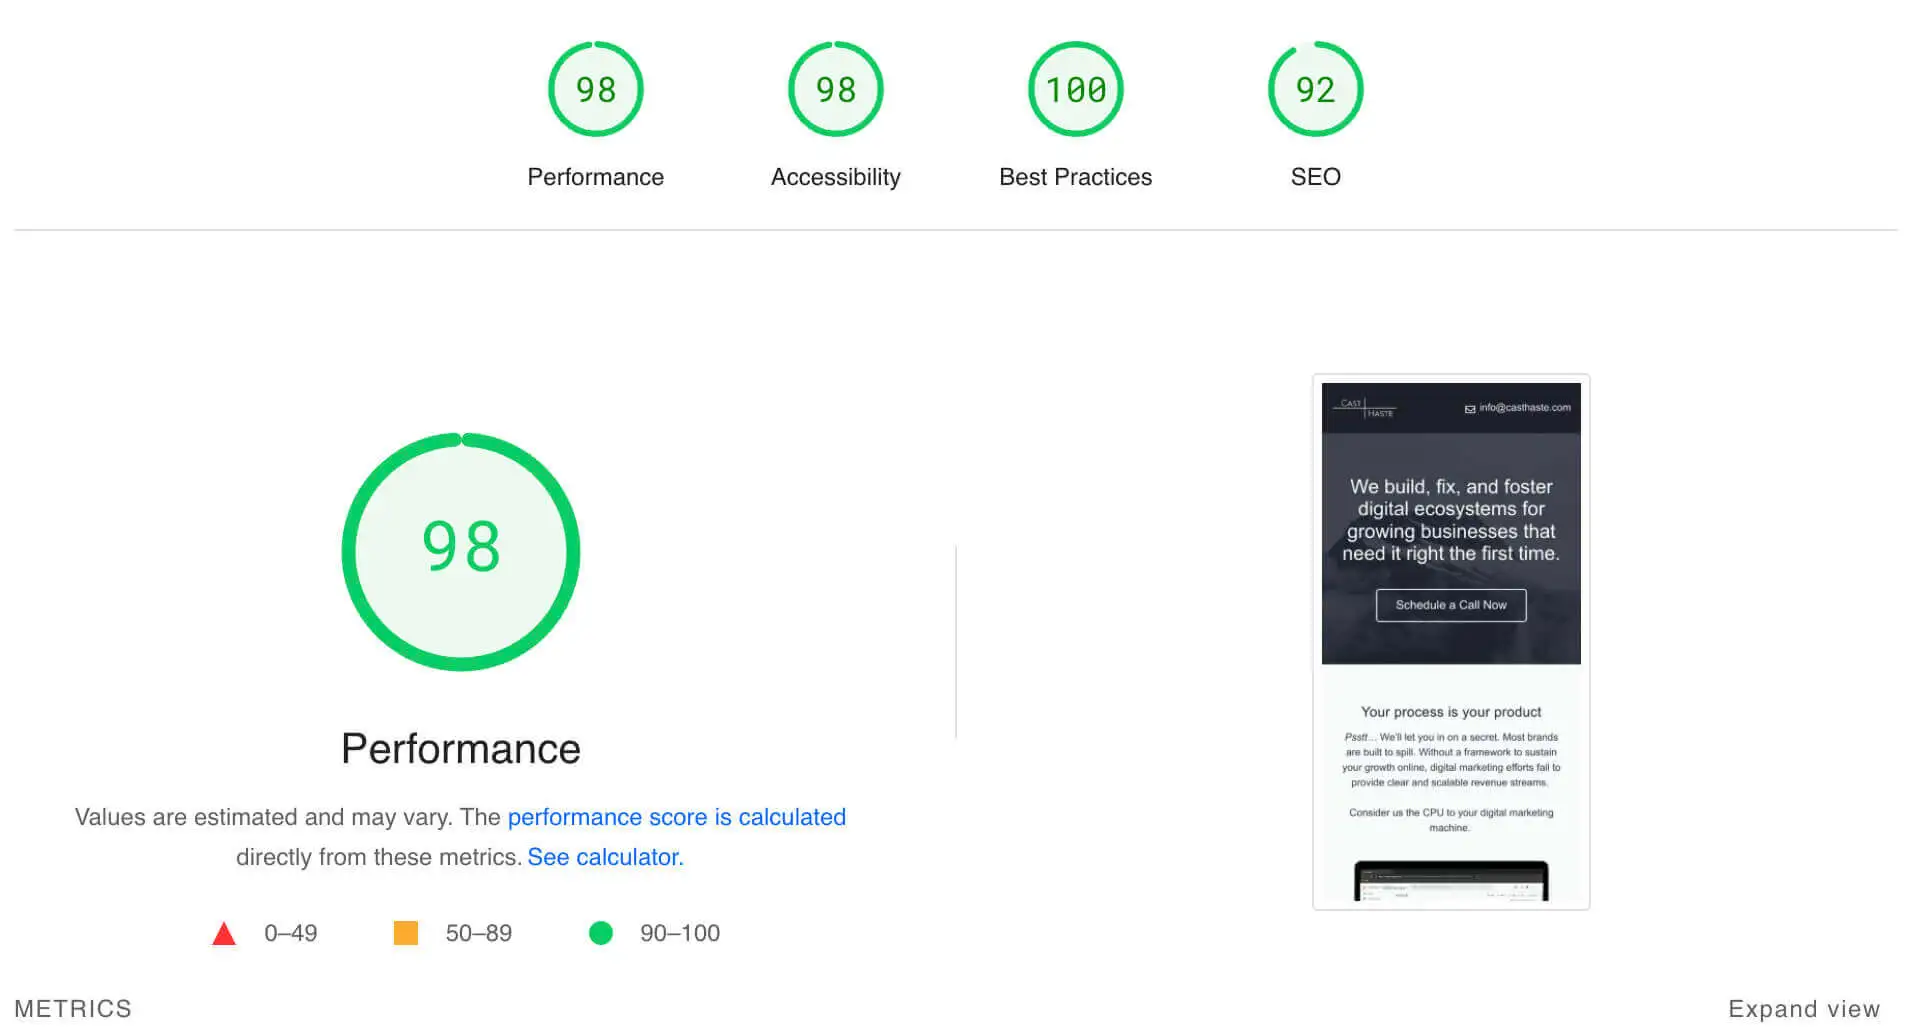
Improve your page speed with image optimization
That is everything you need to know about how to optimize images for the web. It takes a bit of time to learn the process, but once you have it under your belt, your website will load faster. The goal is to have your webpage load in 1-second or less, so keep that in mind while you are testing everything as well.
If you are still having issues getting your website down to that magical 1-second load time and can’t figure out how to get it there, reach out to our team for help. We can help you optimize your website, reach the load time requirements, and help you grow your website traffic in ways you could never have imagined. Contact Cast Haste today to set up an appointment, and see how we can help your website perform the best it can be.